Local NAS Users and Groups
Creating NAS Users
By default “root” User and Group at the NFS client are mapped to “root” User and Group in the VPSA. To prevent remote “root” access to the Volume enable the “NFS Root Squash” setting, either at the time the Volume is created or later under Volumes > Properties. All other client-side Users are mapped to User “nobody” and Group “nogroup”.
To configure a basic NAS authentication so that Users and Groups on the NFS client will be mapped to the corresponding Users and Groups at the VPSA, perform the following steps:
Go to tab and press Edit for NFS Domain. The NFS Domain dialog will appear:
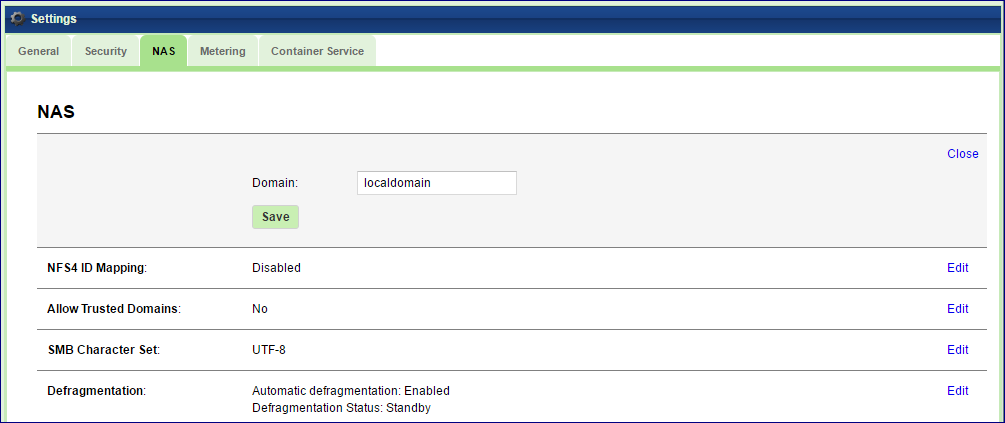
Enter the NFS domain name identical to the domain name set in the Client and press the Update button. Typically the default domain name on a Linux client is “localdomain” and is therefore also the default value in the VPSA.
Note
On a Linux client the domain name is usually set in the /etc/idmap.conf file. It is mandatory to have this value set.
Note
Make sure the “idmapd” service is running (Ubuntu = ‘imapd’, RHEL = ‘rpcidmapd’), and that /sys/module/nfs/parameters/nfs4_disable_idmapping is set to “N”. To make this setting persistent, set the following in ‘/etc/default/grub’ and then run ‘update-grub’:
GRUB_CMDLINE_LINUX_DEFAULT="nfs.nfs4_disable_idmapping=“N”
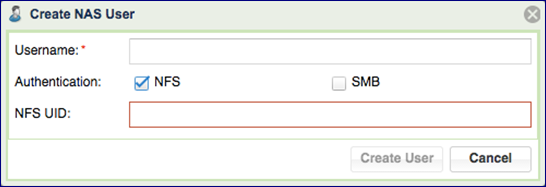
Go to and press the Create button.
Enter a Username.
Select the NFS checkbox for Authentication.
Enter a NFS UID (in the range 1-999,999).
- If you wish to grant this User access to SMB shares as well, also
select the SMB checkbox and enter a password (which will be used later when mounting the NAS Volume on a Windows Client).
Note
This can only be done at the time the User is created, it cannot be changed or added later.
Creating SMB Users
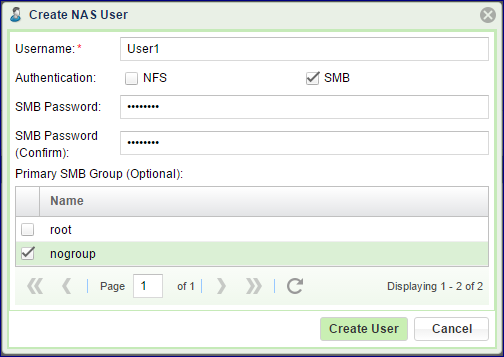
Go to and click the Create button.
Enter a Username.
Select the SMB checkbox for Authentication.
Enter a password. You will be asked to provide this username and SMB password when mapping a network drive on the Windows Client.
If you wish to grant this user access to NFS shares as well, also check the NFS checkbox and enter a NFS UID (in the range of 1-999,999).
Note
This can only be done at the time the User is created, it cannot be changed or added later.
Editing SMB Users Password
It is possible to edit the Password of a SMB User at any time. Go to the NAS Users page and select Edit SMB Password:
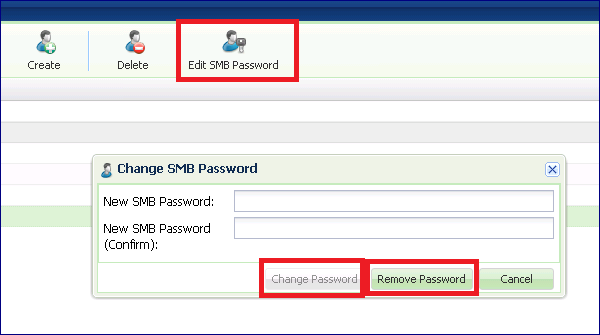
To change the SMB Password enter a new SMB Password, confirm the password and click the Change Password button.
If the User is also defined with a NFS ID you can press the Remove Password button to erase the User SMB Password.
Creating NAS Groups
You can create and view NAS Groups via the NAS Groups page.
To create a NAS Group go to and click the Create button.
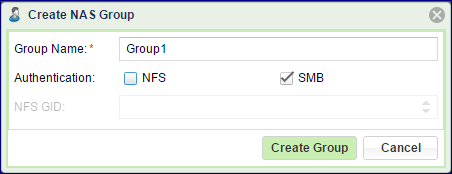
Enter a name for the NAS Group. This should match the Group name on the NFS client.
Select either NFS or SMB checkbox (or both) for Authentication.
If you are creating a NFS group also add a valid NFS Group ID (in the range of 1-999,999) that matches the Group Name and GID on your Linux Server.
Managing NAS Quotas
Enabling or Disabling User/Group/Project Quotas
To enable/disable Quotas on a given NAS share, open the and select the Volume on which you want to set Quotas. In the South Panel, scroll down to the User Quotas and Group Quotas lines and click the edit icon.
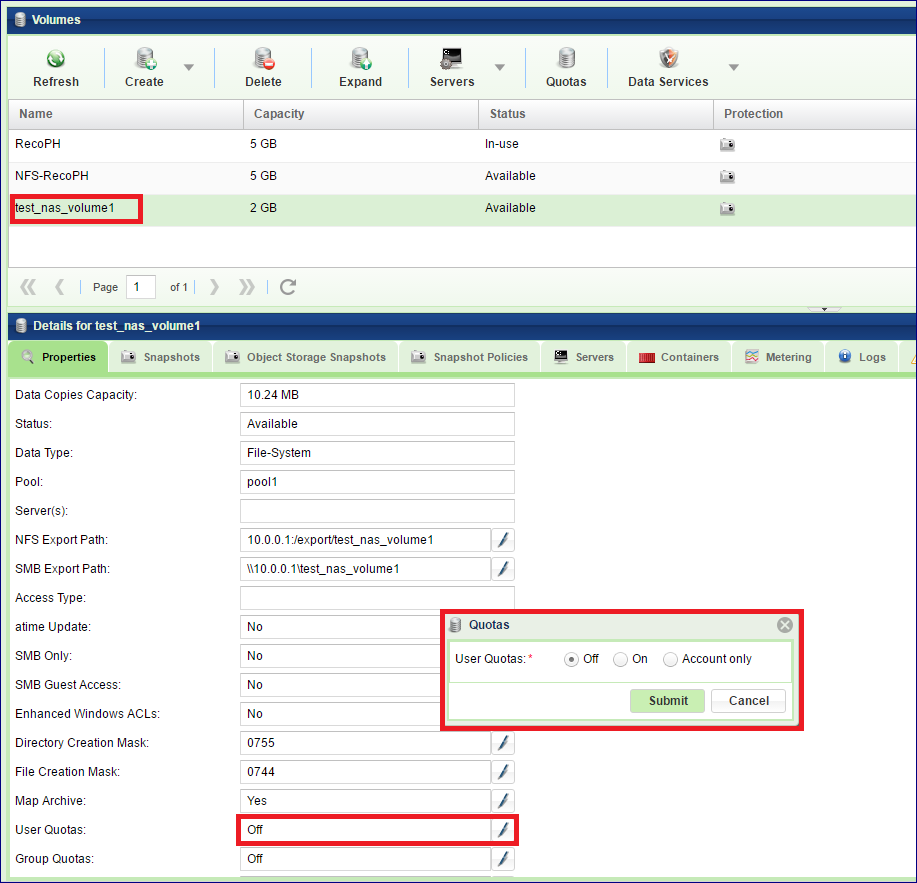
In the dialog that opens, select the Off or On option.
Note
It is not possible to change the state of Quotas (on/off) when the Volume is attached to a Server. The Volume must be detached from any Servers first.
Note
This can also be done on the Volumes tab, select the required Volume, then select Quotas. In here, select Settings > Change Quotas State. In here you can also import and export a Quotas configuration file. See below the format of the Quotas configuration file.
The same process applies for enabling Group and Project quotas.
Note
Group quotas and Project quotas cannot coexist on the same Volume.
Quotas Configuration File Format
This is a CSV file where each line sets the quota for a specific user or group.
The line syntax is the following:
type,is_user,id,usage,soft,hard,warns,name
Where:
type: 1-nfsid or 2-nasuser or 3-aduser
is_user: 0-groups or 1-users
id: uid or gid (if type=’aduser’ and id is still unknown, set to 0 and name will be translated to id
usage: 0
soft: 0
hard: hard limit in MB
warns: 0
name: AD name or NAS name
e.g.:
1,1,50001,0,0,28,0,-
3,1,2015348,0,0,24,0,ZADARA\user1
3,1,0,0,0,24,0,ZADARA\user2
Setting User/Group Quotas
To set quota limits on a given NAS Volume go to the , select the Volume where you want to set up Quotas and click Quotas
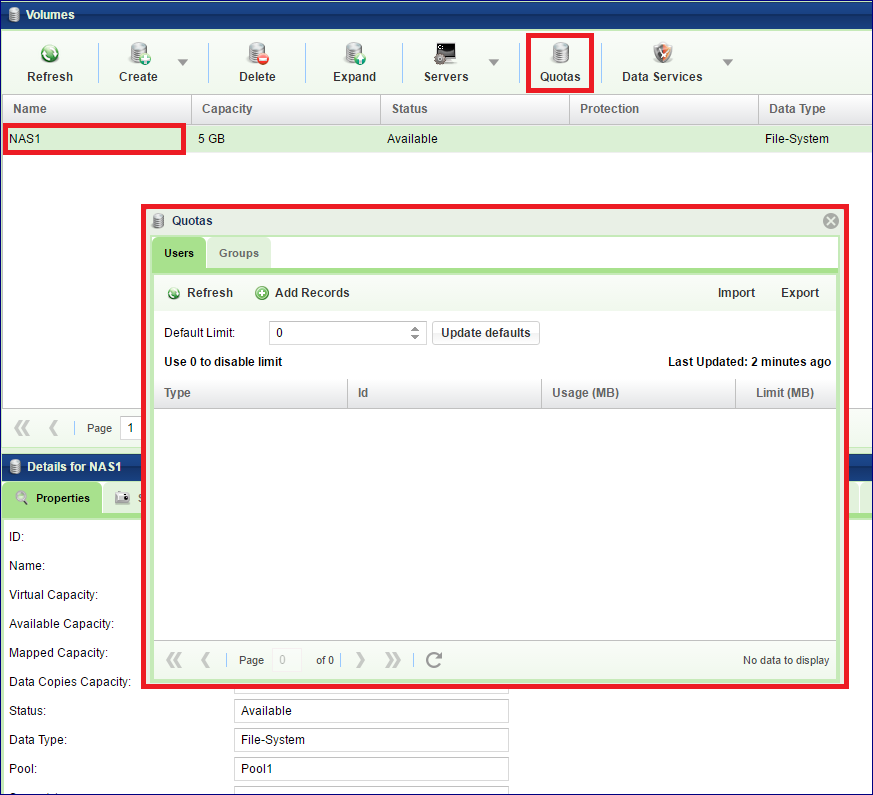
In the dialog that opens, you can set the Quotas for Users, Groups and Projects (as applicable).
If you want to define a default Quota for all Users on the selected Volume, enter the default limit and click the Update defaults button.
Automatic Users discovery:
Press the Refresh button. If this VPSA is connected to an Active Directory the system will scan the AD to find users that have data on this volume. They will all be added and given the default limit. You can edit and change the default value.
Note
Limit set to 0 (zero) means no limit.
If the VPSA is not connected to an Active Directory, a similar scan will be done against all locally defined Users.
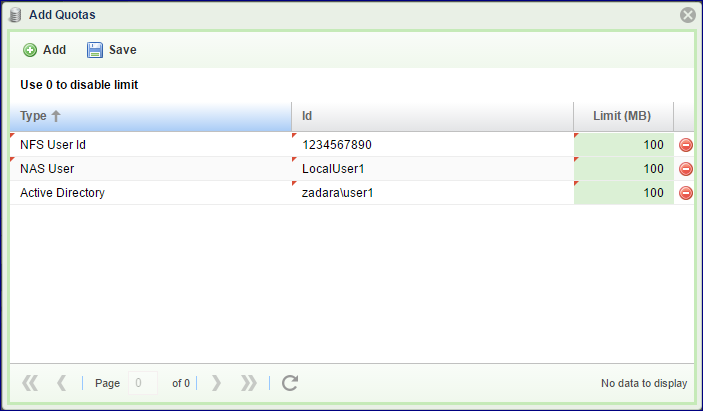
Adding User Quotas manually:
In addition, other Users can be added to the Quotas list even if they don’t currently have any files on the given volume. Click Add Quotas and then fill in the User details in the line that opens. The User ID should be entered according to the User type. There are 3 User types:
Active Directory user – the ID is the user name in this format: Domain\username
NAS user – the ID is the same name as defined in NAS Users.
NFS User – use the UID as defined in UNIX/Linux systems
Setting Groups Quotas is the same as described above for Users. Click the Groups tab and repeat the same process.
Note
For Group Quota accounting the capacity consumed by any individual user is counted against the user’s primary group
After making any additions or changes to Quota Limits, on the Quotas dialogue box press ‘Refresh’ to update the figures displayed.
Setting Project Quotas
Project Quotas are quotas set on a group of one or more folders. Setting these quotas is done in 2 steps: Defining the Projects and then setting the limits.
Defining Projects
To define a Project on a given NAS Volume open the page, select the Volume you want to set Quotas on and click Quotas. On the dialog that opens select the Projects and click Manage projects.

Click Add Project and add directories to this Project. When done click Save and close.
Note
The Folders must exist in the Volume, otherwise you will get an error at this point.

Setting Projects Quotas
Click Add Quotas, select the project of interest and set its quota limit. When done click Add Quotas and close.

Finally, on the Quotas dialogue box, press Refresh to update the Quota Limits displayed.